Orrem is the Bridge of Procession guardian in The Unfound Path. Cleanse the Bridge of Procession Beacon, follow the path to the arena, and plan for two phases: Orrem, the Discarded Golem, with flaming axes and Cascading Fire, then Orrem, the Reclaimed, with faster movement, a tail/spine, and ranged flame or blood-bullet pressure. Favor lateral dodges over backing away, and keep at least one healing flask for phase two.
How to reach Orrem
Section titled “How to reach Orrem”The dedicated Bridge of Procession route reports that The Unfound Path opens through a hole in Marrow Keep after 150 Ova. That number is source-reported and conflicts with another broad search result, so treat it as a verification note rather than a guaranteed threshold. See the Ova guide for the wider progression loop.
Follow this route:
- Enter The Unfound Path through the opening in Marrow Keep.
- Pass the dark cavern and the NPC room where Vratko speaks with you as Sister Genessa. The route source says the foot-wash choice can be declined without penalty.
- Descend the stairs and drop through the deep vertical shaft into the watery cave.
- Read the nearby stone tablets and use the first teleporter to reach the foggy exterior. Clear the enemies and collect Voidstone if you want the pickup.
- Use the second teleporter to reach the stone bridge, then follow the narrow cliffside ledges to the next platform.
- Use the third teleporter to reach the red-lit corridor. Collect Lanolite if desired, then clear the spider-like enemies in the circular arena room.
- Climb the final staircase past a ghost and two scythe-wielding guards to the red structure. The interaction displays BEACON FOUND and BRIDGE OF PROCESSION, summons Sariel, and lets you choose CLEANSE BEACON.
- Continue along the Bridge of Procession path to the guardian arena. One boss-location source describes Orrem as at the end of the path opposite the Beacon, so do not assume the Beacon itself is the boss arena.
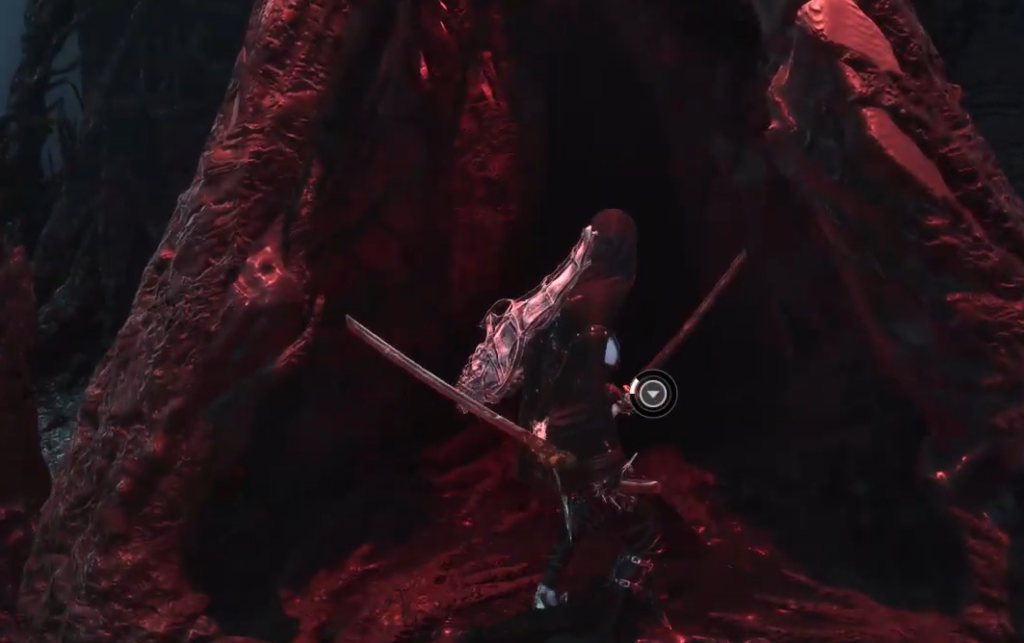
The Bridge of Procession Beacon is the nearest named checkpoint in the checked route. Once cleansed, it provides a full rest and management point, including level-up, Shell and equipment changes, shades, Beacon utilities, and Return to Marrow Keep. See Beacons and fast travel for the broader Beacon system.
Preparation
Section titled “Preparation”- Reserve healing: AllThingsHow and GameTyrant both recommend keeping at least one healing flask for the tail phase.
- Optional summon: Sariel can be summoned for 1 Glimpse. This is optional help, not a stated entry requirement. See the Sariel guide.
- Burn mitigation: GameTyrant recommends the Burnt Effigy because the flaming axes can inflict Burn. The item is not established as mandatory.
- Tiel option: GameTyrant suggests Tiel’s Shadow Dodge for creating Shadow Strikes. This is a source-backed option, not proof that Tiel is the best Shell for the fight; see Tiel.
- Ranged pressure: GameTyrant reports that ranged Tarstone attacks can help maintain distance and may contribute to a phase-two stagger. No specific Tarstone or mandatory weapon is established; use the Tarstones guide for general equipment context.
No checked source establishes an exact weapon level, exact stat threshold, or required Shell.
Phase 1: Orrem, the Discarded Golem
Section titled “Phase 1: Orrem, the Discarded Golem”Orrem begins with two flaming axes. The axes can inflict Burn on contact, and the checked guides describe Cascading Fire flame explosions after a melee combo.
Use this rhythm:
- Keep lateral space instead of relying on straight backward movement.
- When Orrem bangs his weapons on the ground and advances, dodge to the side. GameTyrant specifically reports that backing away makes these attacks harder to avoid.
- After the melee chain, watch for the Cascading Fire explosion before re-engaging. Treat it as a delayed follow-up, not a free punish window.
- When Orrem jumps high and crashes down, avoid the landing area and wait for the landing sequence to finish.
- Take a short punish after a confirmed safe opening, then reset. Do not spend the phase trading health for a long combo.
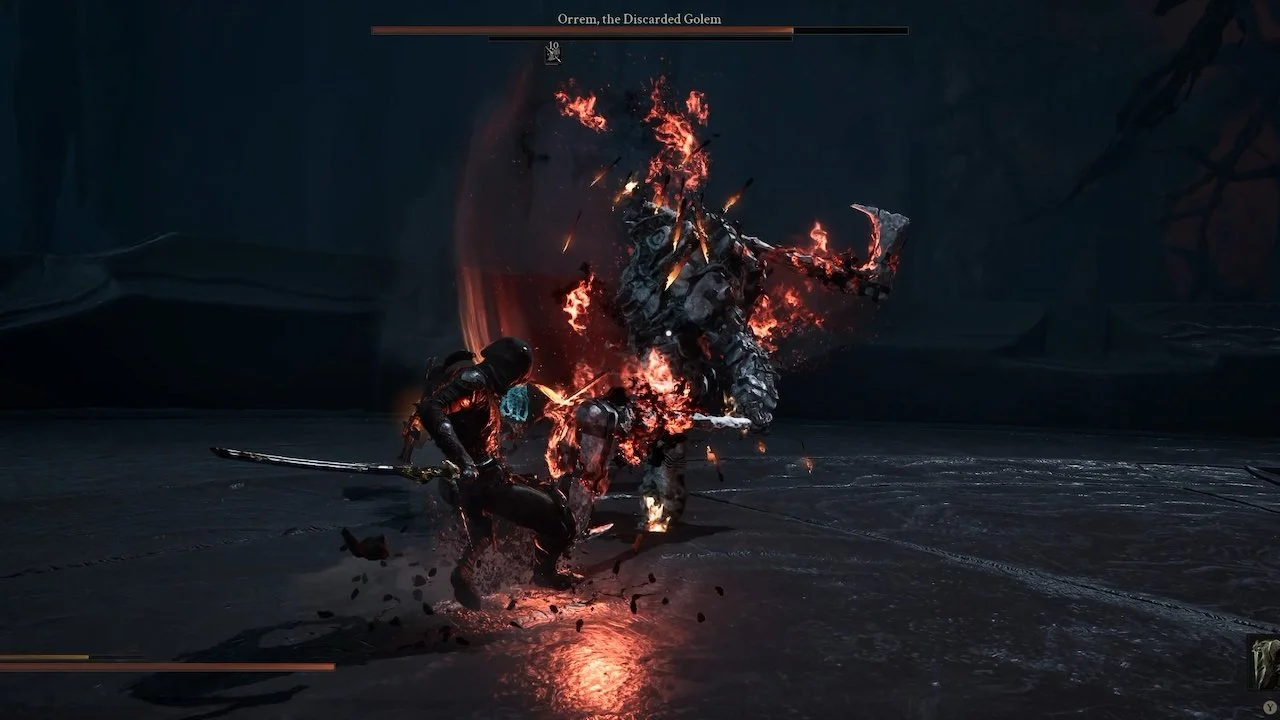
GameTyrant reports a possible Riposte opening around half health. Because that is a timing-dependent, single-source observation, treat it as a possible opportunity rather than a guaranteed scripted event.
Phase 2: Orrem, the Reclaimed
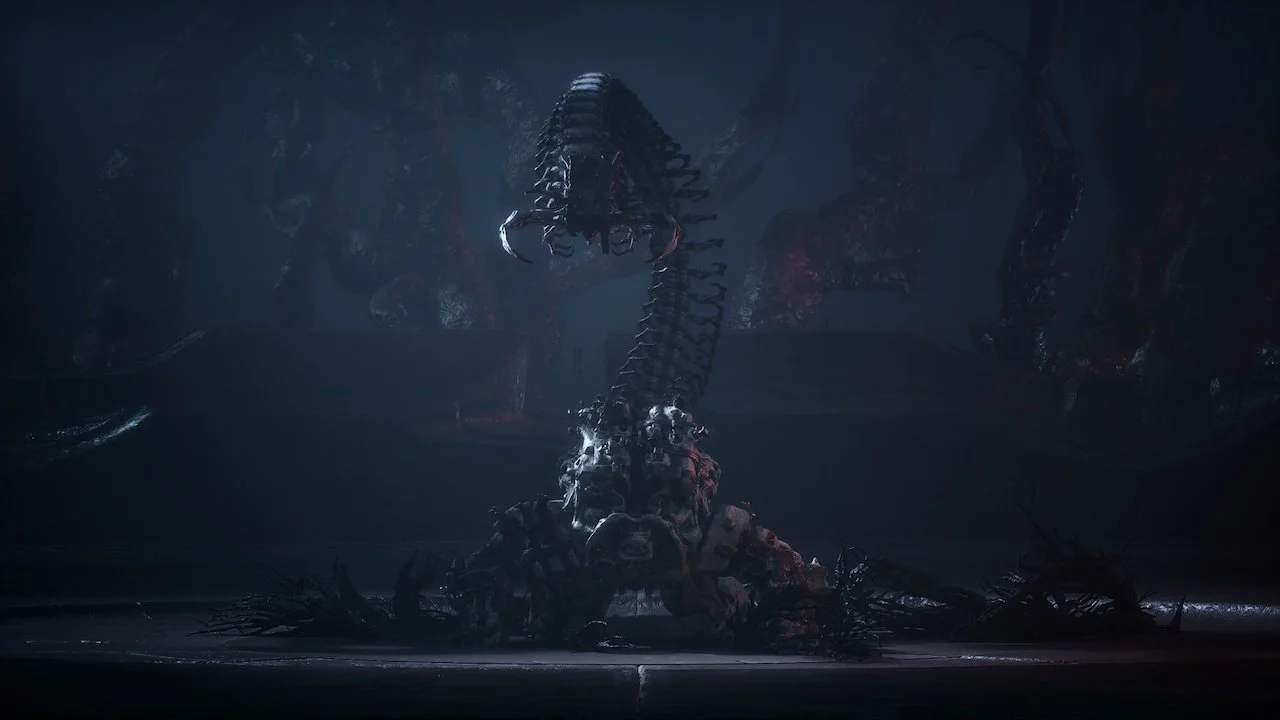
Section titled “Phase 2: Orrem, the Reclaimed”After the first health bar is depleted, Orrem grows a tail or centipede-like spine and becomes faster. GameSpot and AllThingsHow describe more frequent scurrying, tail lashes, and flame explosions from range.
Watch for these patterns:
- Unparryable rush: GameTyrant reports an obvious rush that should be dodged immediately before Orrem lands. Do not try to parry this specific attack.
- Arm slam: An arm slam is also reported as a dodgeable phase-two attack. Exact timing and frame data are not established.
- Red mouth glow: The centipede-like spine can fire blood bullets. When its mouth glows red, move instead of standing in the projectile line.
- Pincer pressure: GameTyrant reports that Orrem may run to one side and wait. Before rushing in, wait for the spine to attempt its pincer; if you approach too closely, Orrem can push itself away. Fighting from range or waiting for Orrem to leap is safer according to that guide.
- Possible stagger: Around half health, GameTyrant reports that Orrem may stagger, especially under safe-distance ranged Tarstone pressure. Treat the trigger and timing as source-reported, not universal.
Keep the camera on both Orrem and the spine. The checked sources establish separate body and spine pressure, but do not provide a complete attack list, exact hitboxes, or exact phase percentages.
Attacks, tells, and counters
Section titled “Attacks, tells, and counters”| Tell or attack | Counter supported by the checked sources |
|---|---|
| Flaming axes and advancing ground-bang sequence | Dodge sideways; do not rely on backing straight away. |
| Melee combo into Cascading Fire | Wait for the delayed flame explosion before punishing. |
| High jump and crash | Move clear of the landing area and re-engage after the landing sequence. |
| Phase-two rush | Treat the reported rush as unparryable and dodge before the landing. |
| Red glow in the spine’s mouth | Move when the glow appears; this is the reported blood-bullet tell. |
| Orrem waits at one side of the arena | Watch for the spine’s pincer, or fight from range / wait for a leap. |
The safest general loop is read the tell → survive the complete sequence → take a short punish → reset. The checked sources do not justify claiming that every attack is parryable or that every red effect has the same meaning.
Rewards and trophy status
Section titled “Rewards and trophy status”- Orrem’s Head: The primary checked reward. GameSpot and AllThingsHow say it can be traded for 5,000 coins in the Marrow’s Keep merchant context.
- Gloom: Gamer Guides lists 64,442 Gloom, but the other checked sources do not independently confirm that figure. Treat it as source-reported and potentially version- or run-sensitive.
- No weapon drop established: The checked sources do not identify a primary weapon as an Orrem reward. Do not confuse the separate Sariel route and its Clockwork Scythe reward with this encounter.
- Lost Your Head: Current achievement listings define this as Defeated Orrem, the Reclaimed. No checked source reports a special pre-kill interaction or a missable Orrem-specific trophy step.
Common mistakes
Section titled “Common mistakes”- Backing straight away: Dodge laterally when Orrem advances with the ground-bang sequence.
- Using every heal in phase one: Keep at least one healing flask for the Reclaimed phase.
- Parrying the rush: The reported phase-two rush is specifically described as unparryable; dodge it.
- Watching only the body: The tail/spine adds projectiles, lashes, and pincer pressure.
- Treating possible openings as guarantees: Riposte and the mid-phase stagger are timing-dependent reports, not confirmed universal triggers.
- Expecting a weapon reward: No checked source supports an Orrem primary-weapon drop.
What happens next
Section titled “What happens next”- Defeating Orrem clears the Bridge of Procession guardian branch and contributes toward opening the central Unfound Path route.
- Continue to the other Unfound Path guardians, The Monolith and Malborn Offspring. The checked sources do not establish a mandatory order among the three branches.
- After all three branches are cleared, the central/final Beacon route toward Zmey the Unbidden becomes available according to the checked route source.
- Use the Bridge of Procession Beacon to return to Marrow Keep if you want to leave. Review the Ova guide for the larger progression context.
Patch and version cautions
Section titled “Patch and version cautions”The checked Balance Patch 1 reporting names changes to other bosses, including The Lost Child and the Monolith, but does not name Orrem. Hotfix 2.0 lists crash, stability, performance, Slayer Seal menu, and riposte weapon-stealing fixes; it does not list an Orrem health, damage, animation, or reward change. The safe claim is that the checked notes do not document a direct Orrem adjustment. Future patches may still change the fight or its rewards; see Balance Patch 1 for the wider patch context.
Sources
Section titled “Sources”- AllThingsHow — Bridge of Procession Beacon Location — Unfound Path entry, route, Beacon, Orrem phases, Sariel summon, and Orrem’s Head.
- GameSpot — All Bosses in Mortal Shell 2 — Unfound Path structure, Cascading Fire, jump slam, phase-two behavior, summon, and reward.
- GameTyrant — How to Beat Orrem — flaming axes/Burn, lateral dodge, Burnt Effigy, Tiel, Riposte, blood bullets, pincer, and ranged-pressure observations.
- Gamer Guides — Boss Locations — Bridge of Procession placement, phase transformation, Orrem’s Head, and source-reported Gloom.
- XboxAchievements — Lost Your Head and TrueAchievements — Mortal Shell II Achievements — trophy condition.
- GamesRadar+ — Balance Patch 1 and Steam Hotfix 2.0 release notes — patch scope checked for direct Orrem changes.