Quick answer
Section titled “Quick answer”After the prologue, reach Marrow Keep and enter Fainweald. Cleanse eligible Beacons, collect Ova, then return to the Ova Nursery and use the Gloom Siphon. Published launch guides disagree on the early Mether’s Breath threshold, so use the in-game unlock prompt as the authority rather than treating one guide’s number as universal.
Mether’s Breath clears the black corruption growths that block routes and adds direct travel between discovered Beacons. Much later, 168 Ovum opens the final route; after the underground boss sequence, Send Ova is the irreversible choice that starts New Game Plus. The final boss does not by itself force the reset, so finish current-world cleanup before selecting Send Ova.
This guide keeps launch-build route uncertainty visible. It does not claim a complete Ova database or invent map coordinates.
What Ova does
Section titled “What Ova does”Ova/Ovum is the progression resource used by the Marrow Keep Siphon. Current sources use both terms for the same progression context; follow the exact wording in your in-game prompt rather than treating them as two separate currencies.
Keep these systems separate:
- Beacons are rest, route, and travel anchors.
- Beacon cleanses and Corrupted Gates are important Ova sources.
- Mether’s Breath is the progression reward that clears corruption and enables direct Beacon travel.
- Gloom is a different resource and is not a substitute for Ova.
For the wider named-Beacon route, see Beacon locations and fast travel.
Early Ova route
Section titled “Early Ova route”The safest launch-build route is objective-based rather than a rigid boss order:
- Finish the prologue and reach Marrow Keep.
- Take the cleared route into Fainweald and activate Widow’s Overlook.
- Continue toward the Blackridge Pass and Mushroom Village branches.
- Cleanse the eligible Beacon dungeons when the menu offers a cleanse. Discovering or resting at a Beacon is not the same as cleansing it.
- Return to the Ova Nursery in Marrow Keep and deposit the collected Ova at the Gloom Siphon.
- Once Mether’s Breath appears, revisit the corruption walls you noted and expand your direct Beacon network.
GameSpot gives these early route examples:
| Beacon route | Reported Ova | What it opens or supports |
|---|---|---|
| Blackridge Pass | 1 Ovum | Early northern route |
| Mushroom Village | 1 Ovum | Village branch |
| Mushroom Village Gate | 3 Ova | Route toward the Glutted Mire Corrupted Gate |
These are source-reported launch examples, not a complete universal reward table. The map fragments guide can help with orientation without replacing named-route evidence.
Mether’s Breath and Gloom Siphon
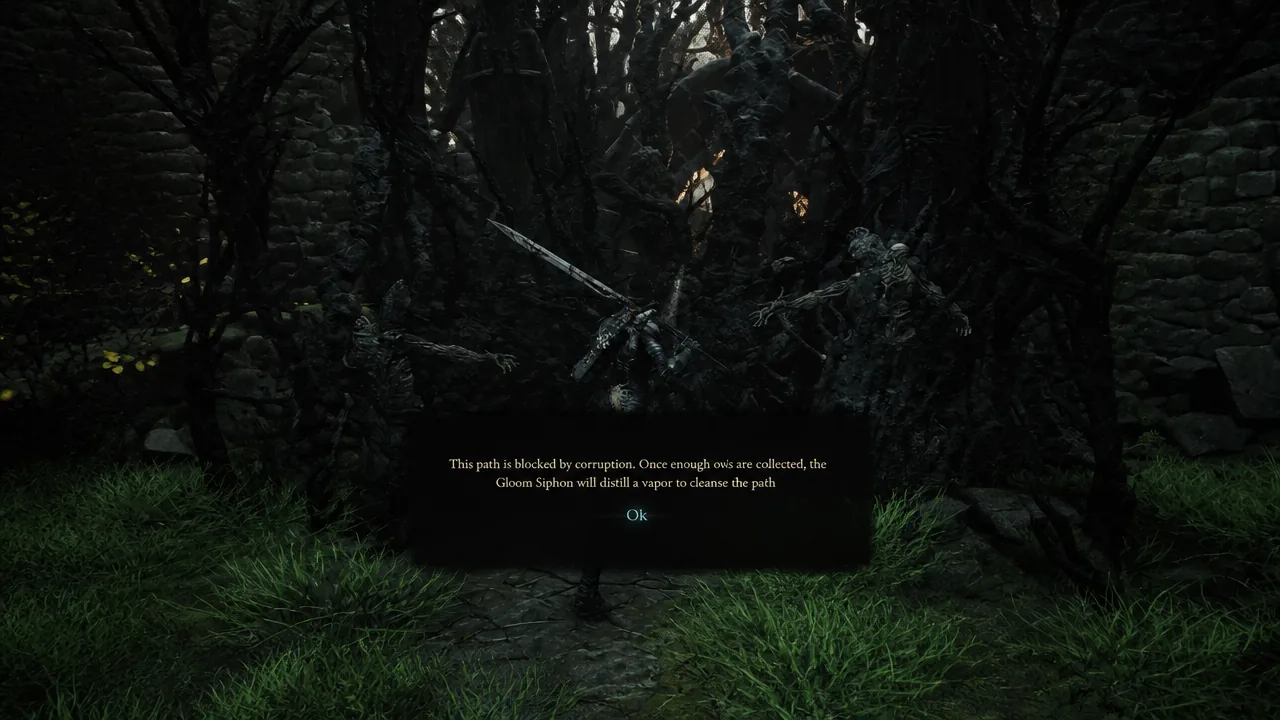
Section titled “Mether’s Breath and Gloom Siphon”Mether’s Breath is unlocked by returning collected Ova to the Siphon in the Ova Nursery. Its two relevant launch-build uses are:
- Clear corruption: remove black tendrils/growths that block overworld paths.
- Travel: move between discovered/rested Beacons without routing through Marrow Keep each time.
The early threshold is the main uncertainty. Current launch reports include:
- GameSpot: at least five additional Ova after the early route.
- AllThingsHow: 7–8 Ova.
- NerdsChalk: 8 Ova siphoned.
- AltChar: 10 Ova as a safe firsthand target, while noting a lower total may work.
The tutorial is also reported to award 3 Ova, which helps explain why “five additional” and “7–8 total” can describe the same early route differently. Do not hard-code one number as a guaranteed threshold. Cleanse nearby eligible Beacons, return to the Siphon after meaningful progress, and check whether Mether’s Breath has appeared.
How to clear a corruption wall
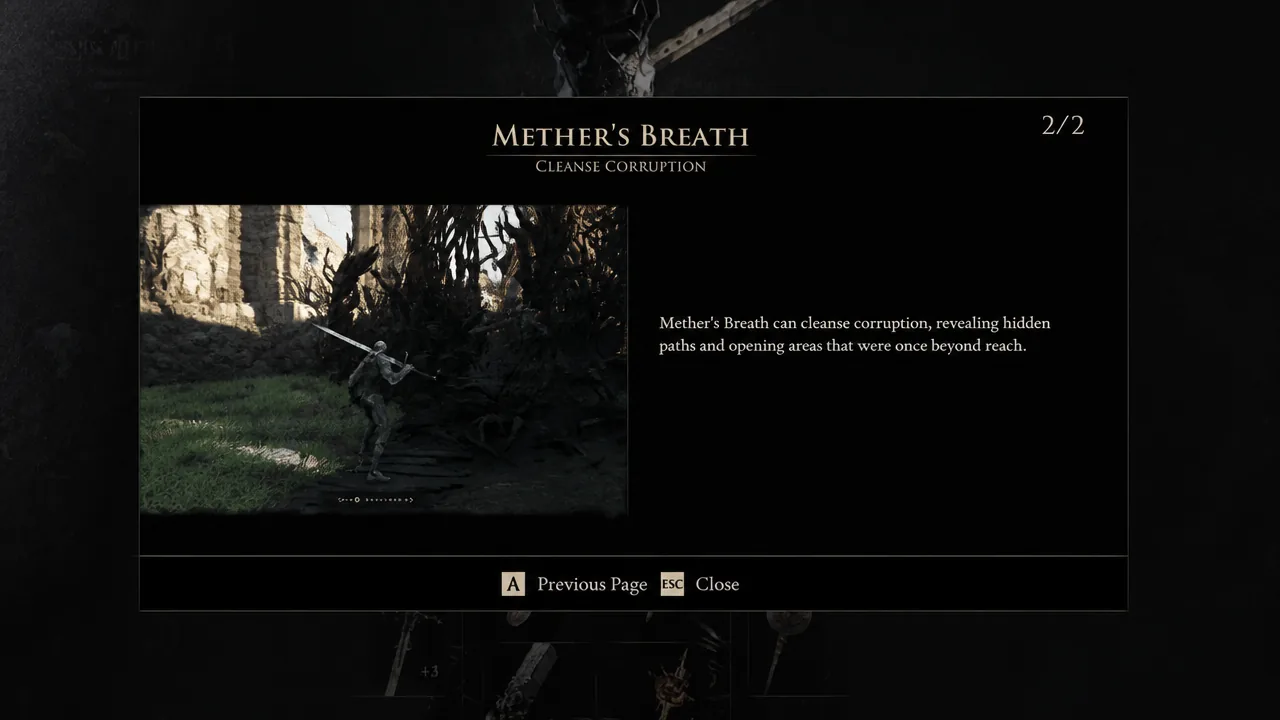
Section titled “How to clear a corruption wall”Before the unlock, a black growth tells you that the path is blocked and that the Gloom Siphon will distill a cleansing vapor after enough Ova are collected. It is a progression gate, not a normal breakable wall.
After Mether’s Breath is available:
- Return to the blocked route from its nearest discovered Beacon.
- Approach the corruption growth.
- Hold the interact prompt until it dissolves. The exact button label depends on the platform.
- Walk through, rest at any new Beacon, and record the next route objective.
Do not keep searching for a key or alternate lever when the game displays the corruption message. If a Beacon still shows an old corruption state after cleansing, treat it as a possible launch-build/UI issue rather than an alternate progression rule. The Gloom farming guide has a practical post-unlock example at the corruption arch north of Blackridge Pass.
Post-boss Ova rewards
Section titled “Post-boss Ova rewards”Current launch guides repeatedly report that the final Beacon appearing after a major Corrupted Gate boss contains 26 Ova. AllThingsHow also lists 26 for clearing a full Gate and its final boss. Use that as route-planning evidence, not as a promise that every Beacon or every partial cleanse pays the same amount.
The practical loop is:
- Clear the eligible Beacon or Corrupted Gate route.
- Defeat the route’s boss when required.
- Claim the post-boss Beacon and its reported Ova.
- Return to Marrow Keep and use the Siphon.
For a late-boss example, see the Zmey guide. For the version-sensitive list of changes, see Balance Patch 1.
All Corrupted Gates and recommended order
Section titled “All Corrupted Gates and recommended order”There are six major Corrupted Gate dungeons in the current launch-build guide reporting: three in Fainweald and three in Mammon. GameSpot’s boss list and AllThingsHow’s boss-location table agree on the six-gate inventory. The table below follows Gamer Guides’ practical route while keeping the regional difficulty curve in mind. The game allows flexibility, so treat the order as a recommendation rather than a mandatory sequence.
| Order | Corrupted Gate | Region and boss | Approach Beacon | Why this order works |
|---|---|---|---|---|
| 1 | Glutted Mire | Fainweald — Magdalena, Lady of the Woods | Mushroom Village Gate | The first major gate recommended by launch route guides; cleanse the Gate Beacon to open the dungeon. |
| 2 | Sanguine Caverns | Fainweald — The Lost Child | Stonebled Gate | The Stonebled Gate Beacon is the named access point; clear it after establishing the southern Fainweald route. |
| 3 | Prisoners’ Domain | Fainweald — The Nameless Captive | Nochtean Gate | The Nochtean Gate sits before this dungeon. If you want Peter’s Perfect Parry, attempt it before killing the boss. |
| 4 | Withered Shoals | Mammon — Hexapod | Gate of Mammon | A practical first Mammon gate: route guides place it close to the Mammon Beacon, and Hexapod is commonly described as one of the more manageable major fights. |
| 5 | Conquered Temple | Mammon — Droeg the Conqueror | Sester’s Gate | This keeps the practical Mammon loop moving east after Withered Shoals; the gate is opened by cleansing Sester’s Gate. |
| 6 | Faded Citadel | Mammon — Isaac, the Scholar Prince | Gate of Infinity | Finish the southern Mammon branch after cleansing Gate of Infinity, which launch guides identify as the access requirement. |
How to use the gate route
Section titled “How to use the gate route”- Activate the approach Beacon, then cleanse it when the menu offers the cleanse route. Discovering or resting at a Beacon alone does not clear the Corrupted Gate.
- Enter the named Gate and clear its dungeon. If a boss is currently a poor match for your Shell or weapon, leave, upgrade elsewhere, and return; the six-gate route is not a single forced corridor.
- After each major boss, sweep the new post-boss Beacon before leaving. Current launch guides repeatedly report 26 Ova at that Beacon, but this is route-planning evidence rather than a promise that every partial Beacon cleanse pays 26.
- Return to the Gloom Siphon when useful and deposit the Ova. Do not confuse the six-gate completion route with the separate early Mether’s Breath threshold or the later 168 Ovum milestone.
The six-gate model is supported by GameSpot and AllThingsHow’s explicit lists of three Fainweald and three Mammon dungeons. One progression article says Mammon has only two gates; that conflicts with those lists and with the named Conquered Temple, Withered Shoals, and Faded Citadel routes. Keep all six in a completion checklist, while labeling the exact minimum number needed for a particular Siphon prompt as unresolved. Use named Beacons and the Beacon locations guide for orientation; this page does not invent map coordinates.
The 168 Ovum endgame requirement
Section titled “The 168 Ovum endgame requirement”Do not confuse the early Mether’s Breath threshold with the separate late-game 168 Ovum milestone.
Current launch reporting describes this sequence:
- Bank 168 Ovum. Corrupted Gates are a major source, but Beacons and other activities can contribute.
- Return to the Gloom Siphon room in Marrow Keep and speak to the NPC there. The threshold opens the route below.
- Clear the four underground bosses reported by current guides; Zmey, the Unbidden is identified as the last.
- Return to Marrow Keep.
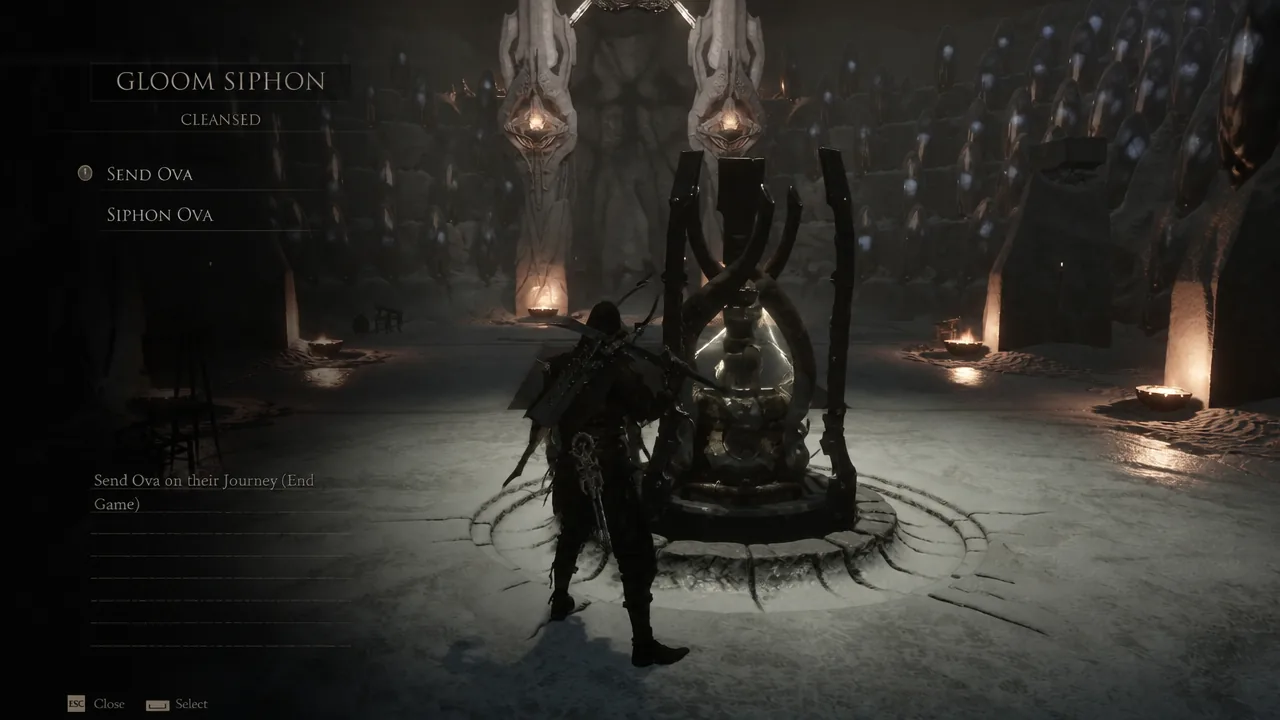
Send Ovabecomes available at the Siphon after the final-boss sequence.
The exact menu wording can vary by progression state, but 168 is consistently reported as the late-game gate in the current launch guides.
Send Ova and the New Game Plus boundary
Section titled “Send Ova and the New Game Plus boundary”Send Ova starts New Game Plus. It is not the same as ordinary Siphon progression, and current reporting says the option has no confirmation prompt.
The important timing is:
- Defeating the final boss does not immediately force NG+. You can return to Marrow Keep and continue current-run cleanup.
- Selecting
Send Ovais the irreversible point of no return for the current world. - Before selecting it, finish optional weapons and Shells, Beacon activation, Tarstones, quests, map work, and any trophy attempt you do not want to repeat.
- Current launch reporting places character-facing progress such as Shells, weapons, and upgrades on the carry-over side, while Beacons, dungeons, quests, Corrupted Gates, and Ova progression reset. Use the New Game Plus guide for the broader carry-over/reset checklist.
The Peter’s Perfect Parry guide is a useful reminder to finish time-sensitive encounter trophies before committing to NG+.
Patch and bug caveats
Section titled “Patch and bug caveats”The reviewed Balance Patch 1 notes list economy, enemy/boss, weapon, Tarstone, and general bug/performance changes. They do not list a change to the Ova threshold, Mether’s Breath, the 168 requirement, or Send Ova. Hotfix 2.0 likewise lists stability/UI and riposte-related fixes, not an Ova-system change.
That does not prove every platform save behaves identically. Community reports describe stale corruption labels, cleansed Beacons missing from a travel list, and occasional Siphon/Mether’s Breath progression issues. If your UI does not match the route above, verify that the Ova was siphoned at the Nursery, revisit the Siphon, and check the current patch before assuming the threshold has changed.
Checklist before Send Ova
Section titled “Checklist before Send Ova”- Cleanse nearby eligible Beacons and deposit the Ova rather than merely carrying it.
- Unlock and test Mether’s Breath against the corruption routes you want open.
- Activate useful Beacons and complete route-specific exploration.
- Finish weapon, Shell, Tarstone, quest, and trophy work you do not want to repeat.
- Reach the 168 requirement and clear the final-boss route when ready.
- Continue current-world cleanup after the final boss if needed.
- Select
Send Ovaonly when you are ready to enter NG+.
How do you get Ova in Mortal Shell 2?
Section titled “How do you get Ova in Mortal Shell 2?”Cleanse eligible Beacon dungeons and Corrupted Gate routes, claim their Ova rewards, and return them to the Ova Nursery’s Gloom Siphon in Marrow Keep.
What is the Mether’s Breath threshold?
Section titled “What is the Mether’s Breath threshold?”It is not safely universal in current launch reporting. Guides report five additional Ova after the early route, 7–8 total, 8 siphoned, or 10 as a safe target. Use the in-game Mether’s Breath unlock prompt rather than treating one number as guaranteed.
How do you clear corruption?
Section titled “How do you clear corruption?”Unlock Mether’s Breath at the Gloom Siphon, return to the black growth, and hold the platform’s interact prompt until it dissolves.
What is the 168 Ovum requirement?
Section titled “What is the 168 Ovum requirement?”It is the late-game threshold that opens the route below the Marrow Keep Siphon in current launch reporting. After the reported four-boss sequence, Send Ova becomes available.
Does Send Ova start New Game Plus?
Section titled “Does Send Ova start New Game Plus?”Yes. Current launch guides identify Send Ova as the irreversible transition into NG+. The final boss returns you to the current run first, so you can clean up optional content before selecting it.
Do Corrupted Gates give Ova?
Section titled “Do Corrupted Gates give Ova?”Yes, they are a major Ova source. Individual payouts vary by route and source; current launch guides repeatedly report 26 Ova for the post-boss/end Beacon, but this page does not claim a complete reward table.
Sources
Section titled “Sources”- AllThingsHow: Unlock Mether’s Breath and Cleanse Corruption — early threshold range, Ova sources, Siphon, and hold-to-interact behavior.
- GameSpot: Where To Go First — Fainweald route, Blackridge Pass / Mushroom Village targets, and reported 1/1/3 Ova rewards.
- GameSpot: Ruk’s Maps and Fast Travel Beacons — discovered Beacons, five-additional-Ova route context, and post-boss 26-Ova Beacon reporting.
- AllThingsHow: Point of No Return / Send Ova — 168 Ovum, four-boss route, Zmey, and Send Ova sequence.
- GameSpot: All Bosses — post-final-boss continuation and Send Ova to New Game Plus context.
- AllThingsHow: Boss Locations — six Corrupted Gate dungeons, boss mapping, and Gate reward context.
- AllThingsHow: Unfound Path — six-gate regional inventory and flexible exploration timing.
- Gamer Guides: Ideal Game Progress Route — recommended Fainweald order and practical Mammon loop.
- NerdsChalk: Mether’s Breath — 8-Ova report and Beacon travel steps.
- NerdsChalk: New Game Plus and Ovum — Send Ova starts NG+ and carry-over/reset boundary.
- AltChar: How to Clear Corruption — corruption behavior, 10-Ova firsthand report, and hold-to-interact behavior.
- Balance Patch 1 notes — reviewed changes; no Ova-system change listed.
- Hotfix 2.0 release notes — reviewed stability/UI fixes; no Ova-system change listed.