Zmey, the Unbidden is the final boss at the end of The Unfound Path. Reach it through the opening beneath Marrow Keep, clear the three tendril-guardian branches, cleanse the Hidden Nave Beacon, and take the updraft into the final arena. In the fight, do not chase every retreat: dodge the straight-line Cosmic Flames sideways, leave the Cascading Flare zone, evade red-icon melee attacks, and take only short punishes after a complete animation.
The reviewed sources disagree on whether the Unfound Path opens at 167 or 168 Ova. Treat that number as uncertain and version-sensitive; use the Gloom Siphon’s current in-game prompt instead of farming to an unverified exact total.
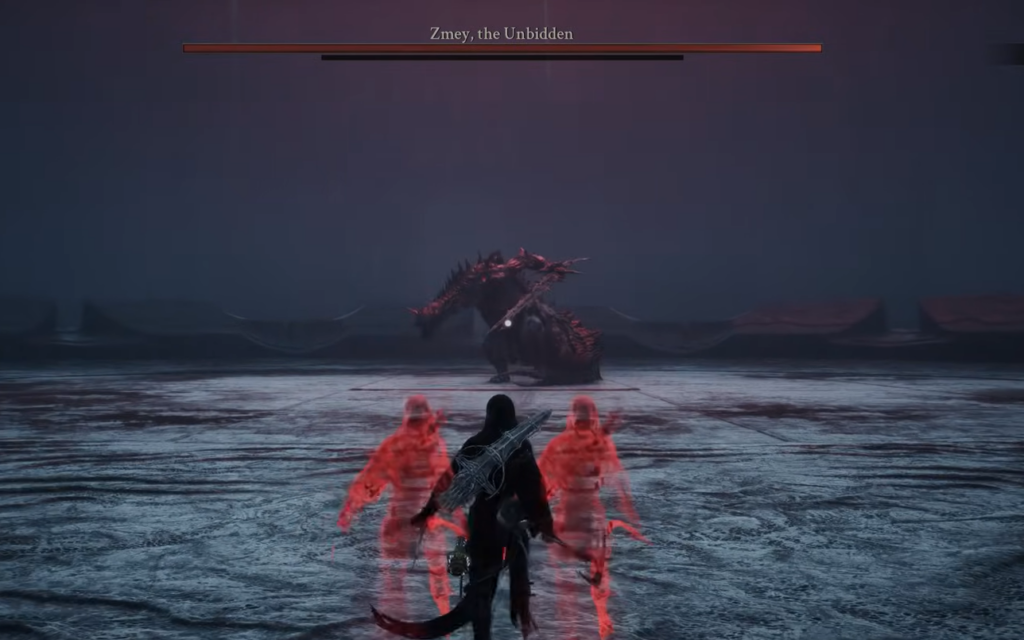
How to reach Zmey
Section titled “How to reach Zmey”1. Open the Unfound Path from Marrow Keep
Section titled “1. Open the Unfound Path from Marrow Keep”The final route begins in the room containing the Gloom Siphon in Marrow Keep. Current coverage reports an entry requirement of 167–168 Ova, not one settled number. Once the Siphon route is available, use the opening beneath Marrow Keep to enter The Unfound Path.
2. Clear all three tendril guardians
Section titled “2. Clear all three tendril guardians”The central route is blocked by three branches. Defeat the guardian in each branch and clear its tendril:
- Orrem, the Reclaimed — Bridge of Procession. See the Orrem guide for its two-form fight.
- The Monolith — Obsidian Vault.
- Malborn Offspring — Faithful’s Shelter.
The sources do not agree that these must be fought in one fixed order. All three must be cleared; choose the branch that matches your current Beacon route rather than assuming the listed order is mandatory.
3. Cleanse Hidden Nave and take the updraft
Section titled “3. Cleanse Hidden Nave and take the updraft”After the three branches are cleared, follow the central route to the Hidden Nave Beacon. Cleanse it before committing to the boss approach. GameSpot reports that this Beacon contains the Endless Core, the late Tarforge upgrade that removes the normal upgrade limit. Review Beacons and fast travel if you need the Beacon interaction sequence.
GamingProMax reports an updraft behind Hidden Nave that rises to the final arena. Land in the arena to start Zmey’s encounter.
Preparation
Section titled “Preparation”Use a familiar Shell and weapon
Section titled “Use a familiar Shell and weapon”There is no cross-checked required Shell or weapon for Zmey. The most reliable preparation is an upgraded loadout whose dodge, recovery, and attack animations you already understand. The fight punishes getting trapped in long animations more than it rewards changing to an unfamiliar damage setup.
Tiel is recommended by Nerd’s Chalk and GameSpot for mobility, stealth, or Shadow Strike opportunities. Nerd’s Chalk also discusses Sester Genessa for safer aggro control. These are source-backed options, not proof that either Shell is objectively best.
Consider Seedbearer’s Scripture
Section titled “Consider Seedbearer’s Scripture”Seedbearer’s Scripture is relevant because Zmey’s Cosmic Flames can apply Cosmic Disease. GamingProMax describes an 80% resistance value, while the existing site guide documents a different active/passive mitigation profile. Because those exact values conflict, this page does not repeat the external percentage as settled fact. The safe recommendation is to bring the Scripture if you have it and follow the local item guide’s verified effect wording.
Optional summons
Section titled “Optional summons”GamingProMax reports that Genessa and Tiel can both be summoned before this encounter. Treat that as an optional, source-reported convenience rather than a prerequisite. Spend Glimpse only if the extra aggro and breathing room fit your run.
Zmey fight plan
Section titled “Zmey fight plan”The stable fight rhythm is:
Read the tell → survive the full sequence → take one or two hits → reset.
Zmey’s size makes every gap look like a large opening. Wait for the actual recovery instead of filling the space with a full combo.
Phase 1: control space around Cosmic Flames
Section titled “Phase 1: control space around Cosmic Flames”GamingProMax describes two broad phases, with a transition around the middle of the health bar. The exact trigger and every phase-two effect are not independently confirmed, so use the visible change in attack behavior rather than treating a precise percentage as a rule.
In the opening phase, stay near Zmey’s side when practical. This reduces exposure to the frontal line and leaves room to move when the boss disengages. Keep enough distance that a red warning or flame zone is visible.
Blade Slam
Section titled “Blade Slam”Zmey may jump or retreat away before slamming the blade down. The follow-up sends Cosmic Flames along a straight line across the arena.
Tell: Zmey creates distance with a jump-back or retreat.
Counter: Do not sprint straight after it. Move sideways when the flame line appears, then wait for the effect to finish.
Punish: Re-enter only after the line has passed and take a short punish during the confirmed recovery. The retreat itself is not a free attack window.
Cascading Flare
Section titled “Cascading Flare”Zmey can stop and cause Cosmic Flames to erupt around your position for several seconds.
Tell: The boss pauses and the flame field begins forming around you.
Counter: Prioritize movement over damage. Leave the active area; do not try to finish a greedy combo inside the effect.
Punish: Nerd’s Chalk advises waiting for the flames to disappear. GamingProMax calls the rooted cast a free-damage opportunity. Because the exact safe timing is not independently documented, use the conservative version: return after the field clears and take a short punish.
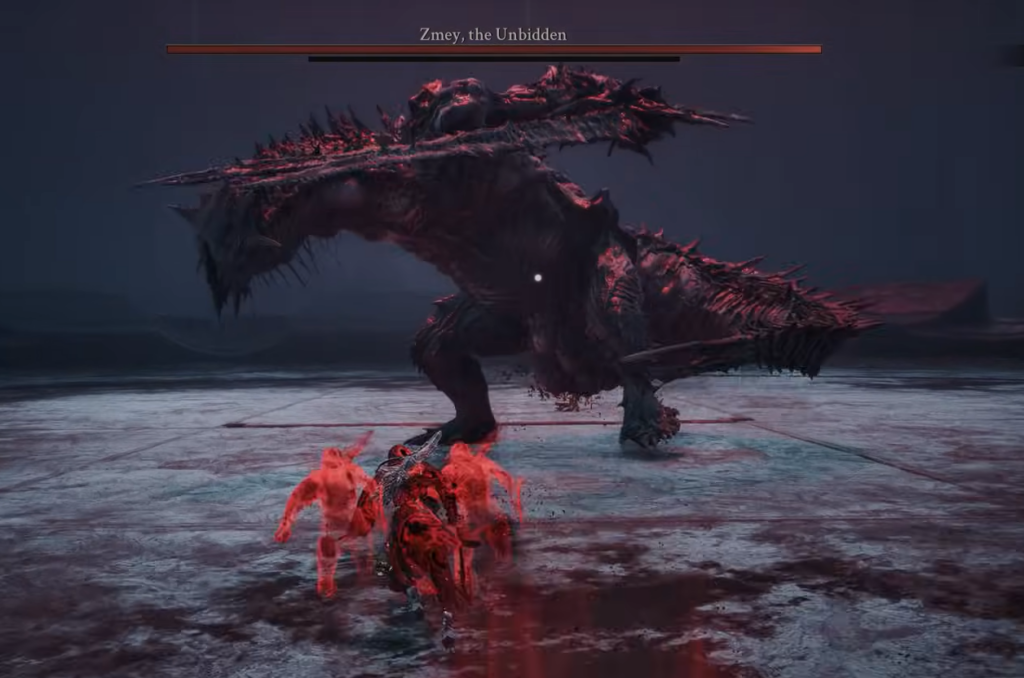
Red-icon close-range attack
Section titled “Red-icon close-range attack”Staying underneath or beside Zmey for too long can trigger a close-range attack marked by the game’s red icon.
Tell: The red warning appears while you are in melee range.
Counter: Stop extending the attack string and evade away from the active hitbox. Do not treat the warning as a parry or trade window. Sources differ on whether the safest direction is backward or sideways, so preserve lateral space and react to the animation rather than following a universal direction rule.
Punish: None during the warning. Reset, reacquire the boss, and wait for the next clear recovery.
Other flame and melee pressure
Section titled “Other flame and melee pressure”GameSpot and the dedicated boss guides describe additional Cosmic Flame and melee pressure, including frontal fire and sword movement. Exact attack names, hitbox timing, and wave counts are not established consistently across the sources.
- Move laterally through straight-line fire rather than trying to outrun it backward.
- Keep the camera on both Zmey and the active flame area.
- If Zmey retreats, wait for the next animation before closing the gap.
- Treat any apparent opening as one or two safe hits until you have personally confirmed the recovery.
Attack and response table
Section titled “Attack and response table”| Tell or attack | Safe response | Punish window |
|---|---|---|
| Zmey jumps or retreats | Wait for the follow-up instead of chasing | None from the retreat alone |
| Blade Slam sends a straight flame line | Dodge sideways across the line | After the flame passes |
| Cascading Flare forms around you | Leave the field and wait for it to clear | Conservative: after the field ends |
| Red icon at close range | Stop attacking and evade; do not trade | After the animation, if recovery is clear |
| Frontal flame or wave pressure | Keep moving laterally until it ends | Re-enter after the effect |
| Long melee sequence | Dodge the complete sequence | One or two hits after recovery |
Rewards and trophy
Section titled “Rewards and trophy”Defeating Zmey unlocks the “It’s over now?” trophy/achievement. The reviewed trophy guide and boss coverage do not require a special weapon, difficulty, or finishing technique.
No named weapon or unique item reward is confirmed by the cross-checked boss guides. Nerd’s Chalk and GamingProMax list no unique reward, while the dedicated AllThingsHow route guide describes a post-fight extraction using the word “Ora.” Because that wording is not independently reconciled with the no-item reports, do not promise a named loot drop.
Is Zmey missable?
Section titled “Is Zmey missable?”The boss fight itself is not reported as missable. The important warning comes after the fight: defeating Zmey and starting New Game Plus are separate actions.
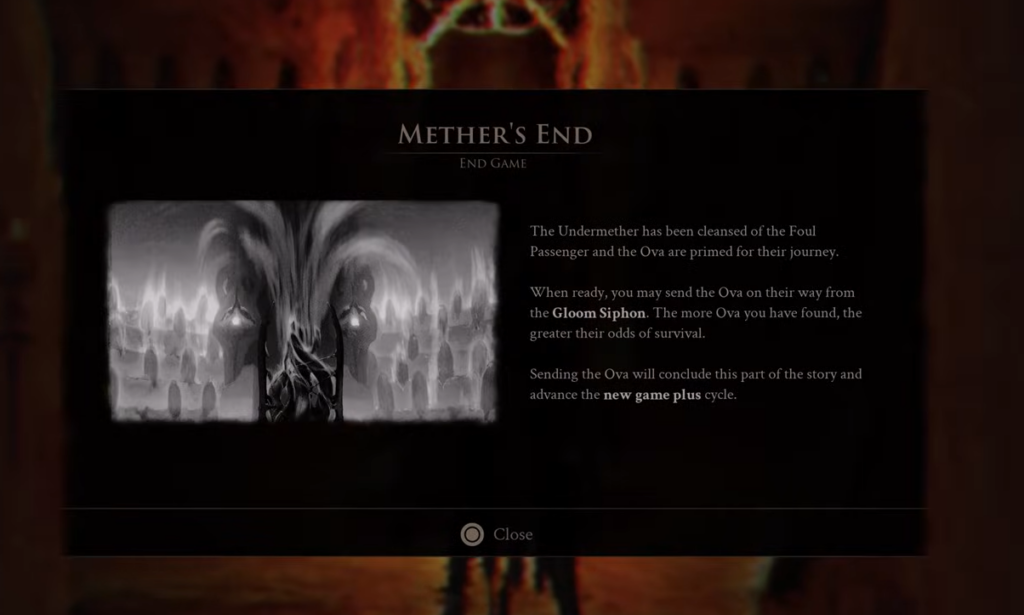
AllThingsHow and GamingProMax report that choosing Send Ova at the Gloom Siphon starts New Game Plus without a confirmation prompt. Before selecting it, finish any optional Shell, weapon, Tarstone, Beacon, memory, or side-quest work you want to complete in the current cycle. See New Game Plus and Endings for the broader post-fight context.
What to do after Zmey
Section titled “What to do after Zmey”- Let the final cutscene and post-fight sequence finish.
- Return to Marrow Keep/current save and continue optional exploration if you still have unfinished content.
- When ready to move to the next cycle, return to the Gloom Siphon.
- Select Send Ova only after accepting that the option immediately advances the New Game Plus cycle.
Defeating Zmey does not by itself require an immediate NG+ start according to the reviewed sources.
Patch status and uncertainty
Section titled “Patch status and uncertainty”The current site Balance Patch 1 page documents economy, weapon, selected boss, and stability changes. The checked patch material does not identify a direct Zmey health, damage, reward, or animation adjustment. That is a statement about the checked notes, not a guarantee that later platform or hotfix differences do not exist.
Keep these claims qualified when updating this page:
- 167 vs 168 Ova: conflicting source values; check the in-game Siphon prompt.
- Guardian order: one source lists a sequence, another says the branches can be tackled in any order; only the requirement to clear all three is stable.
- Phase trigger: two phases are source-reported, but do not hard-code an exact percentage.
- Scripture percentage: external and local values conflict; use the local item guide’s qualified wording.
- Reward wording: trophy is stable; a named item/extraction is not reconciled.
Sources
Section titled “Sources”- AllThingsHow — How to Reach and Beat Zmey, the Unbidden — route, Ova threshold, guardian path, fight approach, Send Ova and NG+ behavior.
- Nerd’s Chalk — Zmey Final Boss Guide — location, Blade Slam, Cascading Flare, red-icon attack, trophy, reward caveat, and Shell recommendations.
- GameSpot — All Bosses in Mortal Shell 2 — Unfound Path structure, Hidden Nave/Endless Core, Zmey attack overview, and no listed reward.
- GamingProMax — Zmey the Uninvited Boss Guide — alternate route naming/order, phase report, attack tells, Scripture recommendation, optional summons, and Send Ova warning.
- AllThingsHow — Mortal Shell 2 Trophy Guide — Zmey trophy condition and the conflicting 167-Ova wording.