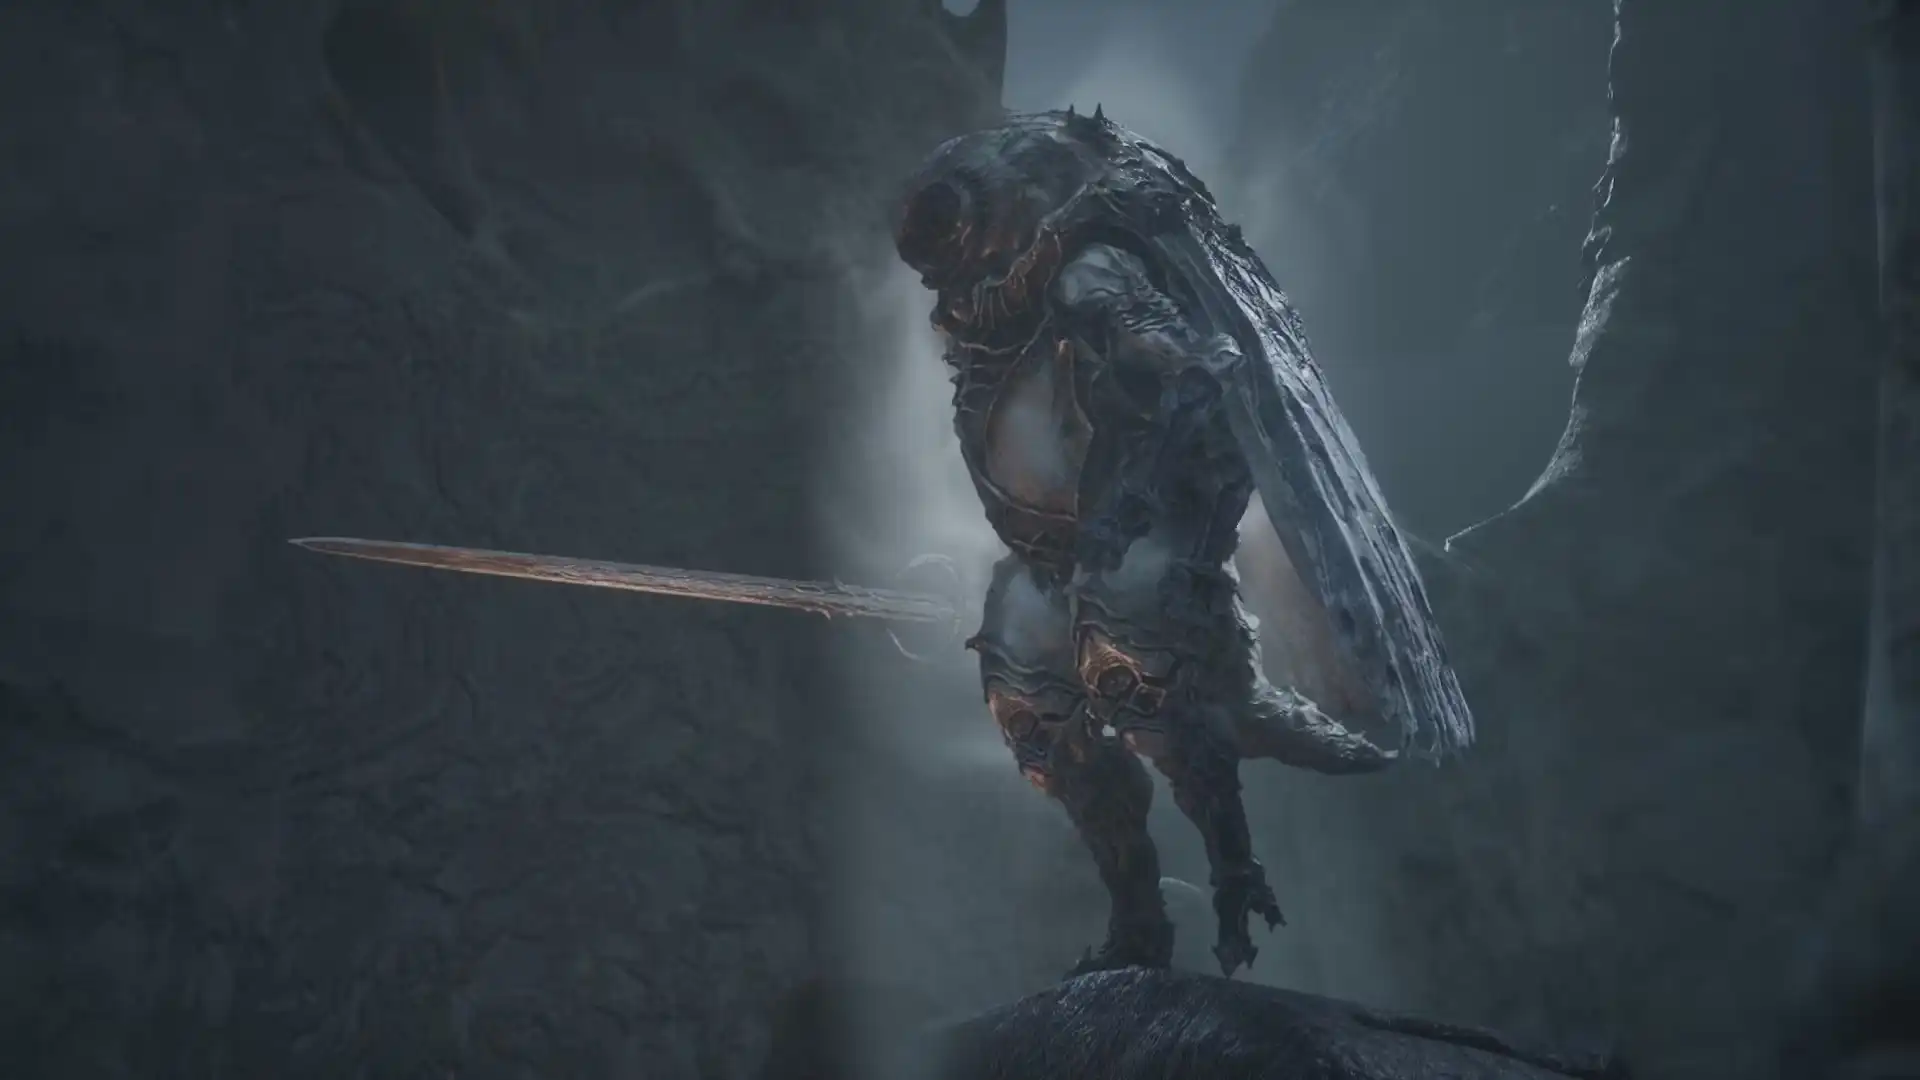
Isaac, the Scholar Prince is the major boss at the end of the Faded Citadel Corrupted Gate in the southern Mammon branch. Reach Ashen Sanctum through Gate of Infinity, defeat the Servants of the Scholar-Prince, activate Citadel Atrium Beacon, and let Isaac come to you rather than chasing him. His long-reaching Leaping Lunge punishes mid-range healing, while his full attack strings leave short recovery windows for one or two hits.
At roughly half health, Isaac kneels and presents a Riposte transition. Current guide reporting says that taking the Riposte removes his shield and starts a faster three-sword phase; avoiding it may preserve the more readable shield phase. Treat that skip as a conditional, patch-sensitive technique rather than a guaranteed mechanic. Defeating Isaac rewards Scholar’s Wormstone, a Tarstone associated with the Clockwork Scythe, and spawns the post-fight Scholar-Prince’s Chamber Beacon with Ova.
Need the full route through Faded Citadel? Follow the Faded Citadel walkthrough for the Ashen Sanctum, Beacon, Solnir, and Isaac approach.
How to reach Isaac the Scholar Prince
Section titled “How to reach Isaac the Scholar Prince”- Reach the Mammon region and enter the Gate of Infinity route into Faded Citadel.
- Cross the first hallway and take the stairs into the Ashen Sanctum area.
- Progress through the dungeon and clear the two blue-flame zones reported on the current route.
- Defeat the Servants of the Scholar-Prince encounter.
- Activate the Citadel Atrium Beacon. This is the useful pre-fight checkpoint documented before the final descent.
- Follow the only available path toward the arena entrance. Ruk is reported nearby and provides a short piece of Isaac’s backstory.
- Activate the optional Lazlo spirit summon for 1 Glimpse, then drop into the arena.
The six Corrupted Gate bosses are described by current sources as route-flexible once their regions are accessible. Do not treat Isaac as requiring a fixed number of earlier bosses or as the mandatory final gate boss unless your own route has made him so.
Preparation and optional help
Section titled “Preparation and optional help”Lazlo is optional. The summon near the arena costs 1 Glimpse and can draw Isaac’s attention while you heal, reposition, or use a sidearm. It is not required to enter or defeat the boss. Do not confuse the Isaac-area spirit summon with unlocking Lazlo as a playable Shell; those are separate pieces of progression.
GamingProMax recommends Tiel for Shadow Dodge and Shadow Strike. That is a practical recommendation, not an objectively required build. Any upgraded Shell and weapon you can use consistently are valid starting points; see the Weapons guide for general upgrade context.
If you rely on ranged damage, note the source-reported shield behavior: Isaac’s shield blocks sidearm shots in Phase 1, while the shield is gone in Phase 2. Save Resolve and sidearm ammunition for a confirmed opening rather than standing still in front of him.
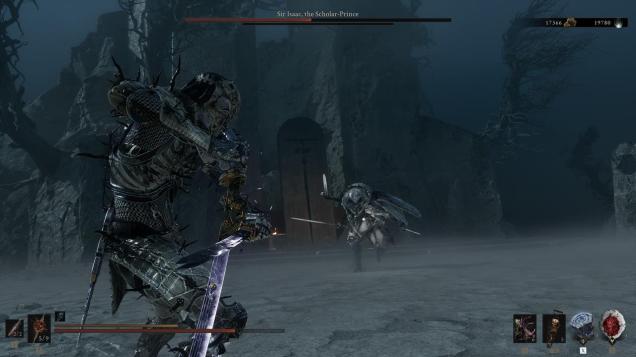
Phase 1: sword and shield
Section titled “Phase 1: sword and shield”Isaac starts with a sword in one hand and a large shield in the other. His normal swings are not the whole problem—the reach on his Leaping Lunge makes apparently safe spacing deceptive.
Use this loop:
Let him approach → survive the full string → punish the recovery briefly → reset.
GamingProMax reports that Isaac’s ground attacks can be parried in this phase. If you are comfortable with parrying, use the readable ground strings to build practice. If not, dodge the complete sequence and attack only after the final swing or landing recovery. Do not chase him when he backs away, and do not heal at mid-range while he is free to move.
Phase 1 attacks
Section titled “Phase 1 attacks”| Attack | Tell | Response | Punish |
|---|---|---|---|
| Leaping Lunge | Isaac jumps forward from distance with his sword | Dodge the landing or move clear of the line; do not heal in front of him | Short combo after the landing pause |
| Aerial Spin Slash | Isaac rises, spins, then drives the sword down | Dodge the aerial swing and wait for him to land | Attack during the brief landing recovery |
| Ground Slash Combo | Two- or three-hit ground sword string | Parry if comfortable in Phase 1, or dodge the full string | One or two hits after the final swing |
The exact attack names above are descriptive labels from current guides, not a claim that every label appears in the in-game UI.
The kneeling transition and the possible Phase 2 skip
Section titled “The kneeling transition and the possible Phase 2 skip”At approximately half health, Isaac falls to his knees. The exact threshold is not independently verified as a precise percentage.
The source-reported choice is:
- Take the Riposte: Isaac loses his shield, picks up two extra swords, and enters the faster three-sword Phase 2.
- Avoid the Riposte: GamingProMax reports that using only heavy attacks or attacks from behind during the kneel can keep Isaac in the more predictable Phase 1 pattern.
The second option is conditional and may depend on the current Riposte rules. Test it rather than treating it as a patch-proof exploit. A separate day-one press report says heavy attacks no longer open a Riposte and only light attacks do, but that report describes its notes in the author’s own words rather than quoting a public developer note.
Phase 2: three swords
Section titled “Phase 2: three swords”If the transition triggers, Isaac drops the shield and fights with three swords. He becomes more aggressive and less predictable, and the rapid follow-ups make an early parry especially risky. The safe adjustment is to dodge the complete string, preserve stamina, and take a short recovery punish.
Phase 2 attacks
Section titled “Phase 2 attacks”| Attack | Tell | Response | Punish |
|---|---|---|---|
| Triple Sword Combo | Three rapid sword swings in succession | Do not assume parrying the first strike covers the follow-ups; dodge the complete string | Hit only after the recovery |
| Rush Stab | A red warning appears before a forward stab | Sidestep as Isaac closes; treat the warning as a dodge instruction | Re-engage after the stab passes |
| Pin Cushion | Isaac tracks you while repeatedly stabbing downward | Keep the rhythm, but delay the final dodge; the reported sixth hit lands after a longer pause | Wait for the delayed sixth hit and recovery |
| Final Spin Attack | At low health, diagonal spins lead into a fast spinning finish | GamingProMax recommends dodging left with each swing and staying close rather than running away | Re-engage after the full sequence |
The final-spin direction is a guide recommendation, not frame-tested proof. If your spacing or camera position differs, prioritize avoiding the complete sequence over forcing one direction.
Attacks, tells, and counters at a glance
Section titled “Attacks, tells, and counters at a glance”- Do not chase: Isaac wants you to rush into his range. Let him close the gap and punish the recovery.
- Do not heal in the middle: Leaping Lunge covers more distance than the visual gap suggests. Heal after a confirmed recovery or while Lazlo has clear aggro.
- Do not parry only the first sword: In Phase 2, the follow-up blades can still connect after an apparent first-hit success.
- Save stamina: Pin Cushion’s delayed sixth strike and the red-warning Rush Stab both punish an empty stamina bar.
- Keep punish windows short: One or two hits are safer than a full combo unless Isaac is visibly locked in a longer recovery.
Rewards, trophy, and weapon connection
Section titled “Rewards, trophy, and weapon connection”Defeating Isaac grants:
- Scholar’s Wormstone: a Tarstone associated with the Clockwork Scythe. Current guide descriptions say it drains Resolve over time to keep the saw running and augment attacks while active. Exact numerical effects are not repeated here because the checked sources do not provide a stable, cross-checked value.
- Gloom: Isaac grants Gloom, but no checked source supplies a stable exact payout. Do not treat a single-run number as universal.
- Scholar-Prince’s Chamber Beacon: the post-boss Beacon contains 26 Ova according to current major-boss and Beacon checklists. Claim the Ova after the fight as part of the wider route.
- Nightmare Fuel: defeating Sir Isaac, the Scholar-Prince unlocks this bronze trophy / achievement.
The Wormstone is the boss reward connection; it is not evidence that Isaac himself grants the Clockwork Scythe weapon. The local weapon guide places the weapon in Sariel’s Chamber of Becoming reward sequence.
No checked trophy source identifies an Isaac-specific missable pre-kill action. That is different from the separate Peter’s Perfect Parry warning for the Nameless Captive, which does not belong to this encounter.
What to do after Isaac
Section titled “What to do after Isaac”- Activate / cleanse the Scholar-Prince’s Chamber Beacon.
- Collect the Ova and continue your wider Ova progression toward the Unfound Path when the campaign threshold is met.
- If you want the weapon rather than Isaac’s Tarstone, follow the separate Clockwork Scythe route through Sariel.
- For a rematch, return to the Citadel Atrium Beacon. The Scholar-Prince’s Chamber Beacon is a post-victory checkpoint, not the pre-fight route anchor.
The checked sources do not establish a single mandatory next Corrupted Gate boss, so choose the next accessible route based on readiness rather than following an invented fixed order.
Common mistakes
Section titled “Common mistakes”- Chasing Isaac after he backs away: You give Leaping Lunge the exact spacing it wants.
- Healing at mid-range: Wait for a confirmed recovery or a clear Lazlo distraction.
- Attacking after the first apparent Phase 1 pause: Confirm the whole ground string has ended.
- Fishing for a Phase 2 parry on the first sword: The remaining blades can still hit you.
- Spending every Resolve point in Phase 1: His shield blocks sidearm shots according to the checked guide; save ranged pressure for Phase 2 openings.
- Treating the Phase 2 skip as guaranteed: It is a source-reported, patch-sensitive technique.
- Copying another boss’s missable warning: Isaac’s checked trophy condition is normal defeat; Peter’s Perfect Parry belongs to the Nameless Captive.
Patch notes and version cautions
Section titled “Patch notes and version cautions”Balance Patch 1 lists direct boss changes for The Lost Child and Monolith, but the checked developer post does not list a direct Isaac health, damage, or timing adjustment. It does list improved light-attack tracking for Clockwork Scythe.
The checked Hotfix 2.0 notes focus on crash, stability, performance, Slayer Seal menu, and enemy-weapon-stealing fixes; they do not list an Isaac-specific balance change.
A separate day-one press report says Isaac gained health and took reduced break damage while his shield held, alongside broader late-game changes. That report describes press-supplied notes in its own words, so treat the detail as version-sensitive rather than as a fully verified developer patch table. If break or Riposte behavior differs from this guide, re-test on the current build.
Sources
Section titled “Sources”- GamingProMax — Isaac the Scholar Prince Boss Guide — route, Citadel Atrium Beacon, attacks, Phase 2 transition, Lazlo, and Scholar’s Wormstone.
- GameSpot — All Bosses In Mortal Shell 2 And How To Beat Them — Faded Citadel overview, shield / Pin Cushion summary, Lazlo, Wormstone, and Ova context.
- AllThingsHow — Mortal Shell 2 Boss Locations — Mammon gate, Lazlo, and reward cross-check.
- XboxAchievements — Nightmare Fuel and TrueAchievements — Mortal Shell II achievements — trophy / achievement condition.
- Cold Symmetry — Balance Patch 1 and Steam Hotfix 2.0 release notes — checked patch scope.
- GamerFuzion — Day One Patch report — press-reported Isaac health / shielded break-damage note, retained as version-sensitive.